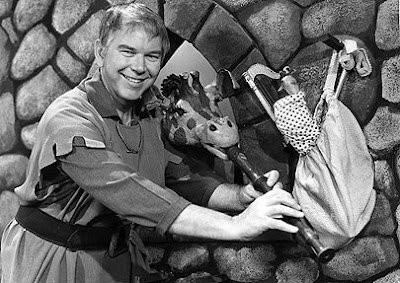
Remember the Friendly Giant? Jamie was soooo freaked out by him. I used to tease her and say, "hey Jame - your favourite show is on!" and she'd get mad and say "That is not my favourite show!!!!" lol.
Anyway, I've been wondering how to widen the picture that I have inside the banner. It's too small and always bothers me.
Help?
I love that banner. I do know there is a way to resize..My husband is a photographer...but alas I am not....Check photoshop and lightroom?
ReplyDeleteGood Luck. Love you blog!
Please stop by Psyche Connections. I would love to exchange blog following links with you if you have an interest.
Linda
The problem is because the image you’re using is 500 pixels wide, but the box containing it is 660 pixels wide.
ReplyDeleteThere are two ways of fixing this. You can make the box narrower, which is much quicker and simpler, but which means the header will be narrower than the column containing your blog posts and sidebar. Alternatively you can make the image wider, which is more elegant but more fiddly.
To do the first, go to your blog’s Dashboard, click on Layout, then on Edit HTML. In the Edit Template box, scroll down until you come to the section ‘Header’.
In the section ‘#header-wrapper’ change the value ‘width:660px;’ to ‘width:512px;’ and click on ‘Save Template’.
The box will now match the width of the image. (The extra 12 pixels is because there’s a 5 pixel ‘frame’ round the image, and a 1 pixel wide border.)
You may also have noticed a slightly irritating gap at the top edge of your background image. You can get rid of this by scrolling down to the sections called ‘#header h1’, and changing the line
‘margin:5px 5px 0;’ to ‘margin: 0;’
The other solution, to make the image wider to match the existing width settings, means you have to have an image editor that’s capable of resizing images. Load your existing image, then resize it so that the width is 648 pixels (660 minus the 12 pixels for the frame and border). Make sure you preserve the aspect ratio, or you’ll get an image that’s stretched out sideways rather than uniformly increased in size. Then save the new image and upload it to your blog in the same way you did the first one.
By the way, you know how I hate to point out people’s use of English, but your title should be ‘Blogging is my only vice’, not ‘vise’. No, there’s no need to thank me. I know how irritating I am.
NOTE: You may want to make a backup of the original template in case of accidents (and also of the altered template). To do this, click on ‘Download Full Template’ and save it to your own computer. Use an easily remembered file name to help you find it again.
That ole Jack and the Beanstalk was scarey to me while I was little! Mean ole thing anyway,lol!...... (The Giant!)
ReplyDeleteI was wondering about how to make our photos larger too, but it eats up our bandwidth quota, so I think I'll just leave mine alone!
Wow, that Simon is soooo wise! I did'nt know *that much* about the html, and changing stuff around!
Ummm, so if I take a shot with my digital and set it larger than that, will it show up larger on my blog? Clueless in Phoenix.....
ReplyDeleteSimon - thanks! And thank you for the "vice" thing. I hate making those kinds of mistakes, but in all this time I never noticed the mistake!
ReplyDeletethanks Simon for the tip. I was wondering what size was needed to make the photo fill in the box.
ReplyDeleteI forgot all about that Jack and the Beanstalk! I found a dvd about Howdy Doody... I'm almost afraid to watch it! lol